Creating a product segment, organise your customers based on what they’ve bought
Websand is built to help ecommerce marketers master data driven marketing. So data segmentation is a cornerstone feature within the platform. This section explains how to create a product segment. A segment to help you to manage and understand which people have purchased a specific product or service that you are selling.
Return to the Segmentation Page
Segment your customers by product purchased
Product segmentation will help you to understand who bought specific products and when they bought them.
That’s not only a great tool to develop some new insights, and increase your sales through targeted email marketing. Product segmentation is also a handy reference point for making key business decisions.
Using product segmentation in Websand, you can understand the number of people who have bought something – rather than just the number of units you’ve sold.
Product segments give you a great foundation for some super targeted data driven marketing, be that that’s upselling, cross selling, or building out a retention programme.
Creating your product segment
Step 1: Select the product segment
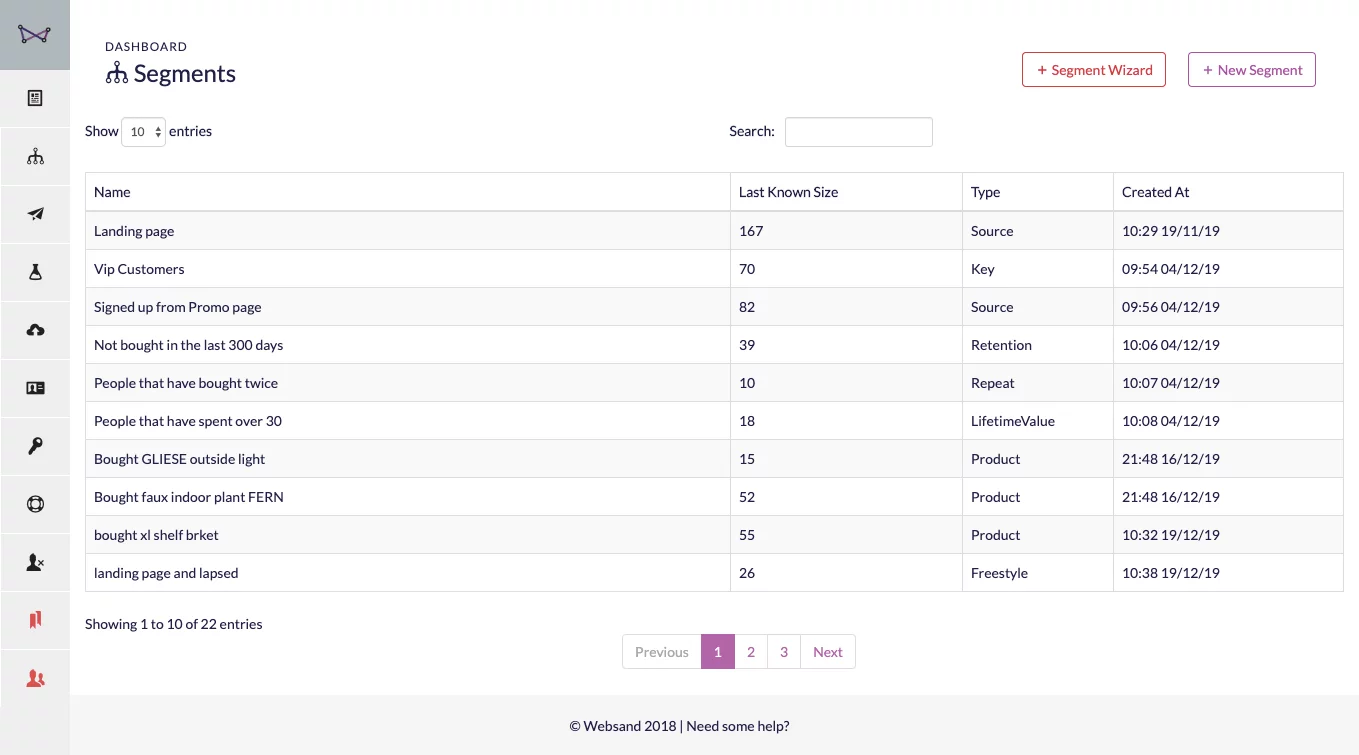
Select Segment from the Websand Menu and then hit the [+ new segment] button in the top right corner of the screen.
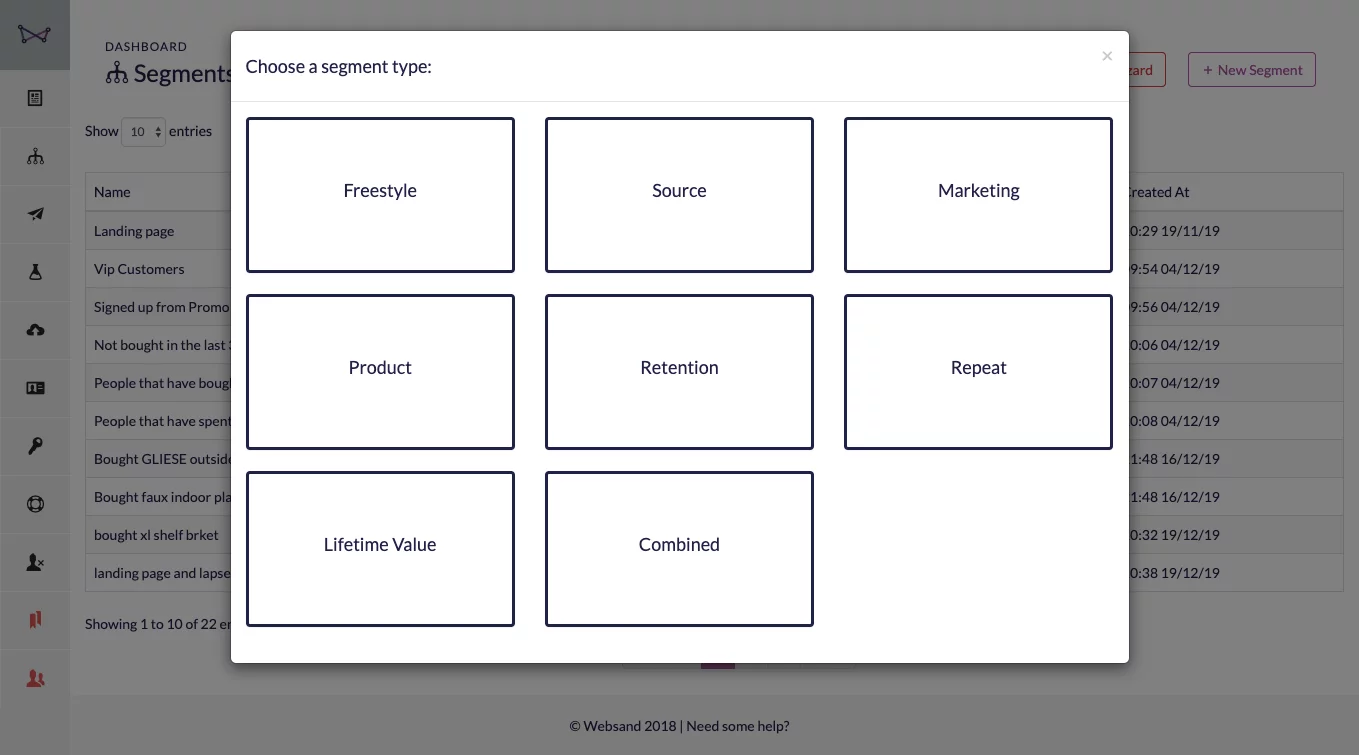
Select Product from segmentation options and that will bring you into the Product Segment screen.
Step 2. Select your Campaign
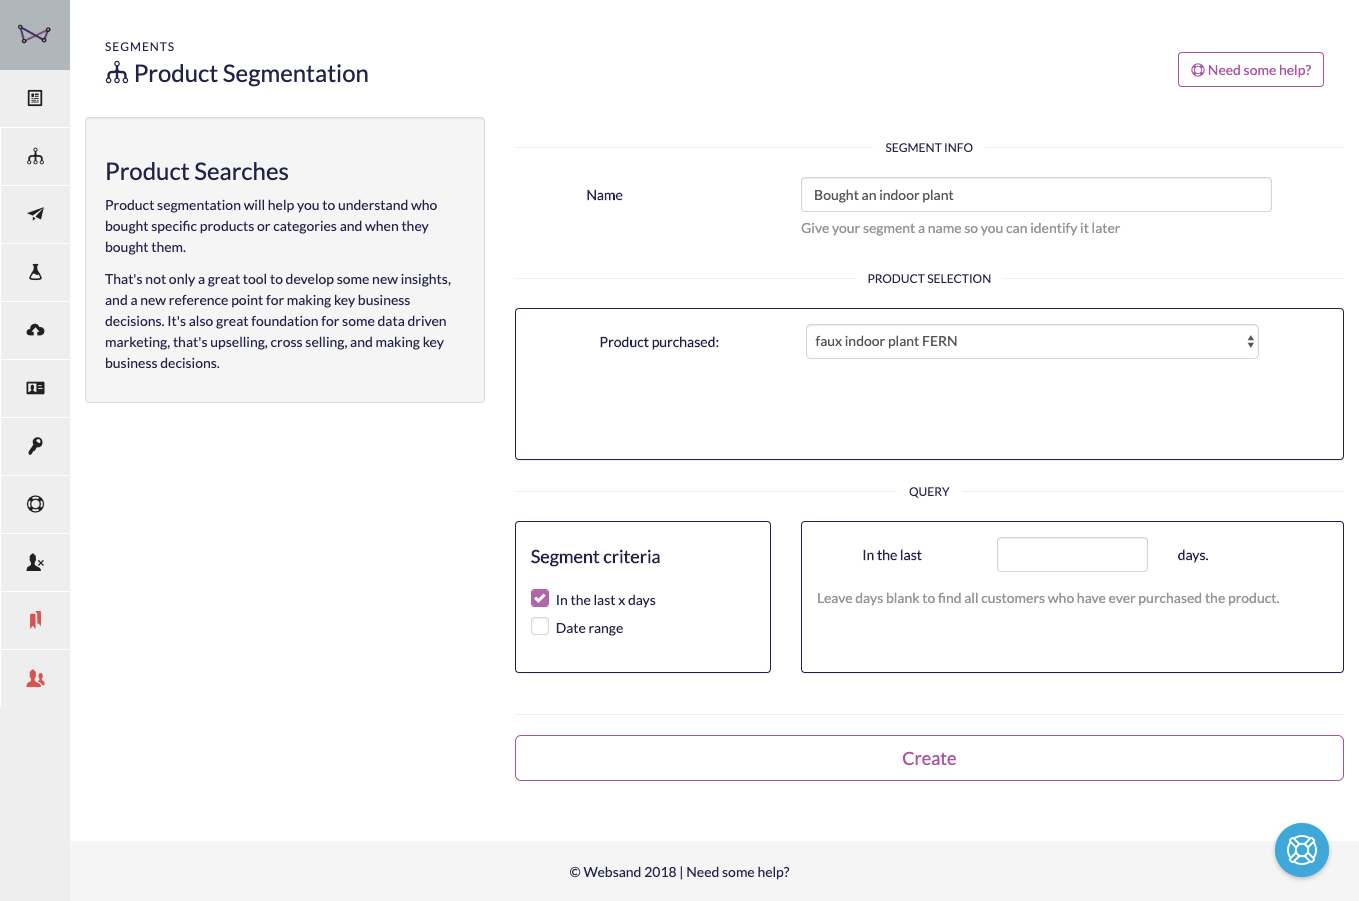
Choose the relevant product from the available dropdown list.
The list will only show the products that people have purchased and have been processed into Websand. So if you have a new product, you’ll need at least one entry for that product option available for segmentation. (Hint: import a test file with your ‘new’ product and it will be added to the source options)
The product segment is based on an individual product or service purchased. If you have a wide range of products or services, and want to create segments based on brand name or product category you can do this through the Transaction Segment wizard
.
Step 3. Select the time frame for the product purchased
Once you’ve selected the relevant product, you can then filter the segment and make it even more dynamic based on the date of the customer purchased that product.
Select from
People that purchased that product in the last [number] of days
People that purchased that product within a specific date range – between [start date] and [end date].
This the date option is an optional step. If you don’t select a time option, don’t worry. The segment will be created based on the total number of people that purchased the selected product.
Step 4. Name and create your product segment.
Use a name you and your peers can easily understand for your segment, for example – “Bought Green Summer Dress”.
Click the ‘create’ button to create your segment.
Boom! You’ve just created a new segment to help you manage your audience. From that day onwards, your customers will be segmented accordingly.
Step 5: Review the results
See the list of people that meet the criteria of your segment. This will update dynamically based on the behaviour of your customers. As new data is collected, people will join the segment. For a product segment, unless you’ve set a time frame to the segment, or decide to purge some data, the audience size for a product segment should always increase.
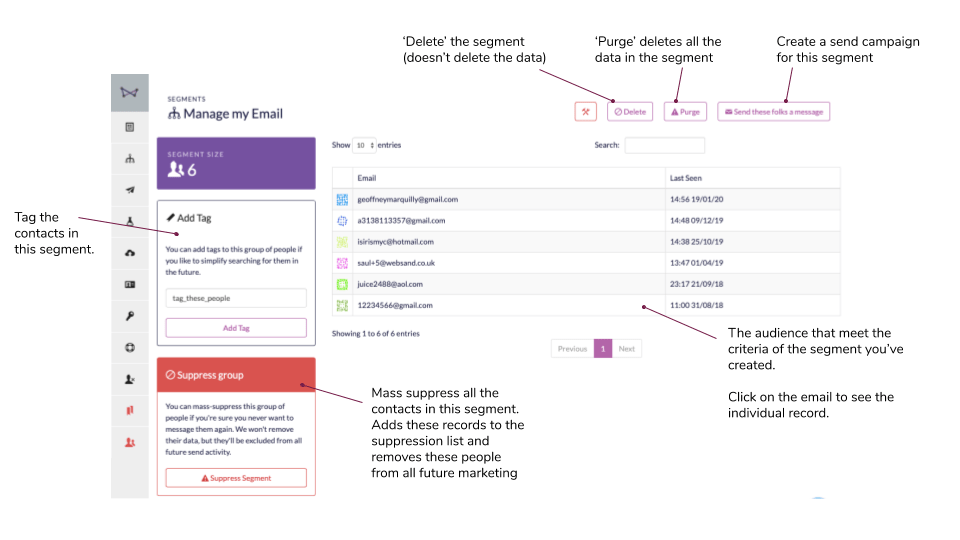
What’s next? Here are some options.
Use this segment power a marketing automation campaign – for cross selling recommendations, upselling related products or driving product specific reviews.
Monitor this segment as a measure of business intelligence. Keep an eye on who is buying which product (number of people buying rather than number of units sold).
Combine this segment with another segment and create a ‘super-powered segment’.
Return to the Segmentation Menu
Need help to get started with segmentation?
If you need more help creating customer segmentation or simply want to know more about how we can help you create data-driven email programmes that perform off the scale, get in touch.
Email support@websand.co.uk or book some time on our calendar.


